Buying a Built-To-Order (BTO) HDB flat is a major milestone, and the blank canvas that arrives is both exciting and daunting. Unlike older flats with pre-installed layouts, BTOs let owners shape the space from scratch, but that freedom demands a solid plan. A well-executed BTO interior design strategy balances aesthetics, functionality, and budget while respecting the structural reality of an HDB unit. The difference between a thoughtful renovation and a costly redesign comes down to planning before the first nail goes in. This guide walks through the essentials: space planning, color and materials, storage, and zoning, all tailored to the constraints and opportunities of a typical BTO home.
Key Takeaways
- BTO interior design success begins with understanding structural constraints and fixed anchor points like load-bearing walls and utility risers before planning your layout.
- Maximize small living areas by creating distinct functional zones using furniture placement, flooring transitions, and vertical storage rather than building additional walls.
- Light neutral base colors combined with strategic accent colors and larger-format tiles make BTO homes feel more spacious while improving durability and ease of maintenance.
- Plan the kitchen work triangle carefully for a BTO unit, keeping the sink, stove, and refrigerator within 3–7 paces to minimize steps and improve workflow efficiency.
- Invest in fundamentals like quality flooring, durable cabinetry with soft-close hinges, and proper bathroom waterproofing—these decisions protect your BTO for decades and prevent costly redesigns.
- Use vertical space strategically with floor-to-ceiling cabinetry, floating shelves, and wall-mounted storage to maximize organization while keeping at least 40% of wall space clear to avoid visual clutter.
Understanding BTO Homes and Design Potential
A BTO flat arrives as a bare shell, walls, floor slab, and ceiling, often with a bare concrete finish and no internal walls dividing the space. The beauty is flexibility: the challenge is understanding load-bearing walls and what can actually be moved.
Most HDB BTOs have a non-structural brick infill wall running down the center or side, separating the living and sleeping zones. This wall can sometimes be partially removed or reposition doorways, but any structural alteration requires professional structural engineers and HDB approval. Any openings larger than a doorway or changes to the external wall envelope almost certainly need permits and professional sign-off.
The standard BTO footprint ranges from 35 to 100+ square meters (roughly 375–1,000 sq ft), with typical ceiling heights between 2.6 and 2.8 meters. This confined vertical space means every design choice, from cabinetry depth to light fixture placement, affects how spacious the home feels. Understanding these constraints upfront prevents costly redeployment of pipes, electrical conduits, or structural members halfway through renovation.
Space Planning and Layout Optimization
Effective layout starts with understanding how residents move through the flat. In a BTO, the entry corridor, living area, kitchen, bedrooms, and bathrooms must function as a cohesive flow without wasted circulation space.
Begin by measuring the actual interior dimensions (many BTOs have nominal measurements that vary slightly), then sketch the floor plan to scale using graph paper or a free tool like Floorplanner or SketchUp. Mark the locations of fixed elements: HDB structural columns, load-bearing walls, ventilation ducts, and utility risers. These anchor points constrain where walls, appliances, and plumbing can go.
For a 3-room BTO (around 65–75 sq m), a common layout pairs an open-plan living-dining area with the kitchen on one end, two bedrooms, and one bathroom. This arrangement minimizes hallway length and maximizes usable floor area. Consider sight lines from the entry, can residents see into the living area? Is the kitchen visible from the main living space? These sightlines affect how spacious the home feels.
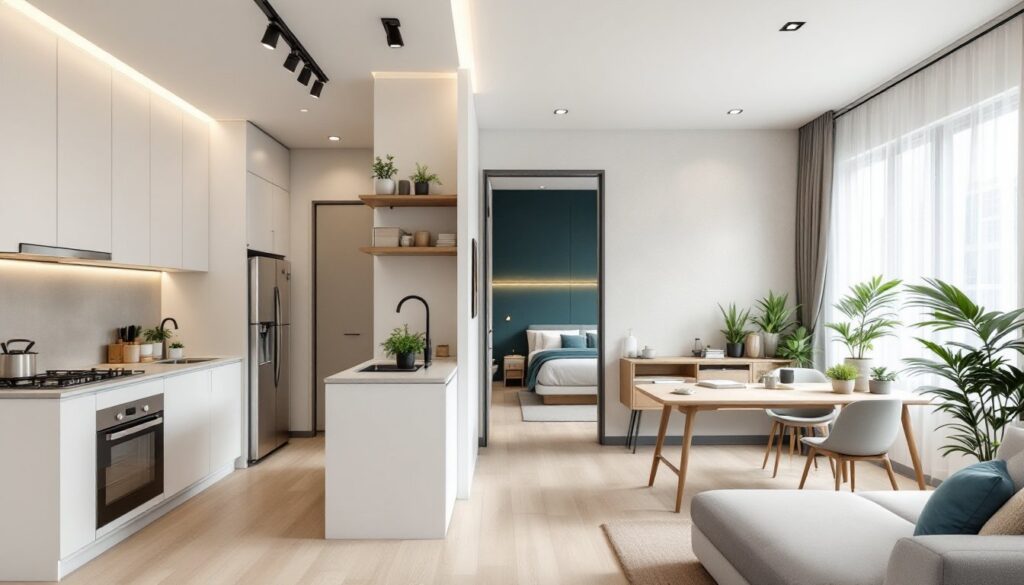
Maximizing Small Living Areas
Small doesn’t mean cramped. The trick is creating distinct functional zones without walls. Use furniture placement, flooring transitions (e.g., a wood-look tile in the living area versus marble-finish tiles in the dining zone), and subtle height differences, like a raised platform around a seating area, to define spaces psychologically.
Floor-to-ceiling cabinetry draws the eye upward, making rooms feel taller. Keeping at least 40% of wall space clear of clutter visually expands the area. Glass-fronted cabinets, open shelving, and strategic mirrors multiply perceived space. In a 2-room BTO, one bedroom can double as a study with a built-in desk: the living area can incorporate a dining table that’s also a workspace. Each piece of furniture should earn its place by serving multiple functions or storing things that would otherwise clutter surfaces.
Color Schemes and Material Selection
Color and material choices set the emotional tone and affect how spacious a flat feels. In small HDB units, light neutral base colors, off-white, soft gray, or warm beige, keep walls recessive, allowing accent colors and textures to shine without overwhelming the eye.
For walls, high-quality acrylic paint (not cheap latex) provides better coverage and durability in high-traffic areas. Plan on 1 liter per 10–12 square meters of wall area: two coats is standard. A primer is essential before the finish coat, especially over bare concrete or dark existing paint. Eggshell or satin finishes are more durable and easier to wipe clean than flat finishes, important in kitchens and bathrooms.
For flooring, the choice often comes down to budget and household needs. Porcelain tiles (60×60 cm or larger format) are durable, easy to clean, and hide grout lines better than smaller tiles: they suit high-traffic zones like kitchens and entry hallways. Wood-look tiles mimic hardwood’s warmth without the water sensitivity or maintenance burden of real wood. Engineered wood can work in bedrooms if properly sealed and kept dry. Avoid cheap vinyl: quality luxury vinyl plank (LVP) with an underlayment offers better durability and comfort underfoot.
Material selection for cabinetry should balance cost and longevity. Melamine-faced plywood is budget-friendly and moisture-resistant in kitchens: solid wood veneer over MDF looks richer but costs more. Stainless steel or soft-close hinges and drawer runners cost 20–30% extra but last longer and feel more substantial. Don’t skimp on cabinet hardware, it’s visible daily and takes daily wear.
Accent colors, on a feature wall, inside an open shelving unit, or as painted trim, inject personality without overwhelming small spaces. A deep forest green, navy blue, or terracotta works well as a secondary color, paired with light neutrals. Test paint samples on the wall itself: lighting at different times of day will shift the appearance.
Functional Zones and Smart Storage Solutions
In a BTO, every corner must work harder. Strategic zoning and built-in storage are the difference between a home that feels organized and one that feels chaotic.
Use floating shelves, wall-mounted cabinets, and corner carousels to claim vertical space in living areas and bedrooms. A 2-meter-tall shelving unit on one wall can hold books, plants, and display objects without consuming floor area. In small bedrooms, built-in wardrobes that stretch from floor to ceiling and wall to wall beat freestanding furniture, they maximize storage and look integrated, not crammed.
Under-bed storage (via drawers or low containers) captures dead space: the trick is leaving room for airflow so moisture doesn’t accumulate. Open shelving in living areas risks looking cluttered unless styled deliberately with a mix of books, plants, and a few curated objects. The “rule of three”, grouping objects in odd numbers, feels natural to the eye.
Hallway and entryway storage often gets overlooked. A built-in shoe cabinet or wall-mounted hooks with a small shelf above the entry door keeps clutter from spilling into the living area. Many HDB BTOs have unused wall space above internal doors, perfect for shallow shelves.
Kitchen and Bathroom Design
Kitchens are expensive to redo, so planning this zone deserves care. The work triangle, sink, stove, and refrigerator, should minimize steps, ideally within 3–7 paces between each point. For a small BTO kitchen (2–2.5 meters wide), a galley layout (two parallel runs of cabinetry) or an L-shape works best: an island wastes precious space unless the kitchen is at least 3 meters deep.
Cabinet depth is typically 60 cm, but shallow 45 cm cabinets exist for tight spaces. Counter height is standardly 90 cm, though some prefer 92 cm for taller cooks. Laminate countertops are budget-friendly and durable: quartz engineered stone costs 2–3× more but is non-porous and requires no sealing. Real granite and marble need regular sealing and stain easily, not ideal for rental flats or busy households.
Backsplash tiles protect the wall and add visual interest. 10×10 cm tiles or larger mosaics suit small spaces better than tiny tiles, which create visual clutter. Grout color matters: lighter grout recedes: dark grout defines the pattern.
In bathrooms, wall-hung vanities (supported by a steel frame bolted to the structural wall) free up floor space and make cleaning easier than pedestal or floor-mounted units. A moisture-resistant exhaust fan vented to the outside (not just to the ceiling plenum) prevents mold. If the HDB doesn’t have one, installing a dedicated 120 CFM bathroom fan is a worthwhile upgrade that requires running ducting, likely through the ceiling cavity, possible if there’s no structural obstruction.
Bathroom tile choices should prioritize slip resistance: textured porcelain or matte finishes are safer than polished. Shower areas especially should use non-slip tiles. Waterproofing the shower enclosure, including the walls, floor, and joints, prevents costly water damage to the structure below. This isn’t a cosmetic step: it’s structural protection. Many builders skimp on waterproofing, so inspecting or redoing it during renovation is money well spent.
Conclusion
A thoughtfully designed BTO interior maximizes function within tight constraints and creates a home that feels spacious, organized, and welcoming. Success hinges on three moves: understanding the structural limits and fixed points, planning the layout to minimize wasted circulation, and choosing durable materials that justify their cost. Skip the Pinterest inspiration and focus on how the space will be lived in daily. Invest time and money in the fundamentals, good flooring, sound cabinetry, proper waterproofing, and your BTO will serve comfortably for decades.