
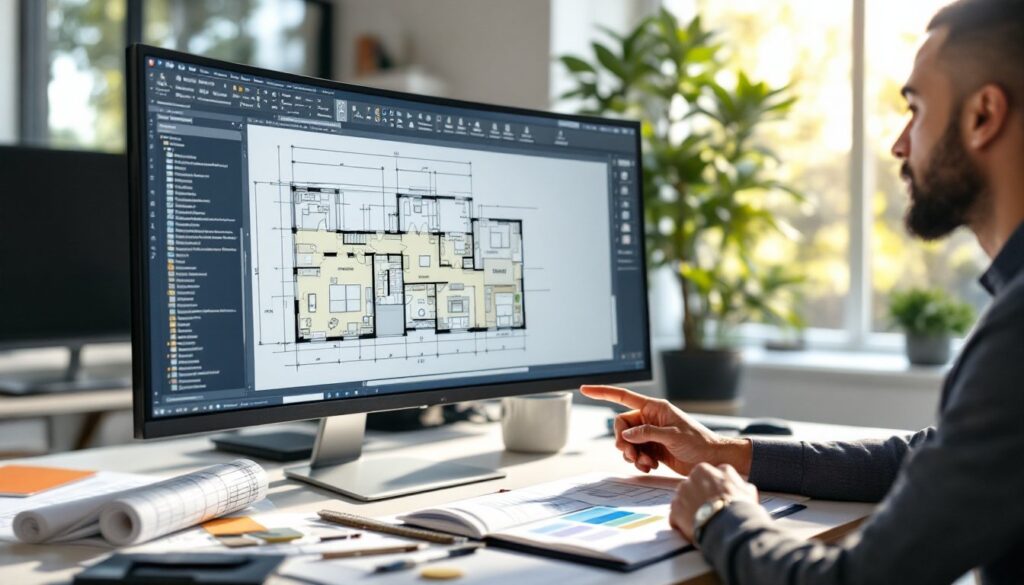
Interior designers increasingly rely on AutoCAD to translate creative vision into precise, client-ready layouts. Unlike generic design software, AutoCAD for interior design offers the exact dimensional control and professional output that clients and contractors expect. Whether drafting floor plans, positioning furniture, or preparing construction documents, AutoCAD delivers accuracy and efficiency that manual sketching simply cannot match. This guide walks designers through setting up AutoCAD, creating accurate plans, and using the tool to streamline client communication and revisions.
Key Takeaways
- AutoCAD for interior design provides uncompromising precision control, allowing designers to specify measurements down to fractions of an inch and create scaled drawings that clients and contractors expect.
- Set up your AutoCAD project with the Architectural (US) template, establish separate layers for walls, doors, furniture, and dimensions, and use the 1/4″ = 1′ scale standard for residential floor plans to save hours of cleanup.
- Create reusable furniture blocks at full-size dimensions (1:1 scale) and insert them into floor plans to verify clearance requirements, ensuring seating arrangements have proper spacing and traffic paths remain at least 36 inches wide.
- Export final AutoCAD plans as high-resolution PDFs with scale bars and title blocks, then walk clients through the design using on-screen markup or printed copies to prevent misinterpretation of sizes and clarify design decisions.
- Use AutoCAD’s layer system to organize complex layouts and maintain version control by saving separate files for revision options and freezing base architectural layers after final approval to prevent accidental edits.
Why Interior Designers Are Choosing AutoCAD Over Other Tools
AutoCAD stands apart from subscription-based cloud tools and simplified design software because it offers uncompromising control over precision and output. A designer working with AutoCAD can specify measurements down to fractions of an inch and generate scaled drawings suitable for both client presentations and contractor bids. The software’s layer system lets designers organize complex layouts, walls, doors, electrical, furniture, into separate, controllable elements that can be toggled on and off without losing data. This flexibility is invaluable when iterating designs or preparing documents for different trades. Many interior designers who’ve used Sketchup, Canva, or web-based alternatives eventually return to AutoCAD because they hit accuracy ceilings with those tools. AutoCAD also integrates seamlessly with other professional software, allowing designers to import site surveys, export to PDF or DWG for contractors, and maintain consistency across projects. For designers handling residential remodels, commercial fit-outs, or spec work that requires submitting drawings to building departments, AutoCAD’s credibility and technical depth are non-negotiable.
Setting Up AutoCAD for Interior Design Projects
Starting a new AutoCAD file for interior design means choosing the right template and configuring basic settings before touching a wall. Open AutoCAD and select a template, Architectural (US) is the standard for residential and commercial interior work in North America, as it uses feet and inches by default and includes architectural line weights. If your office uses custom blocks or title blocks, load those now. Next, establish drawing units and scale. For residential interiors, a 1/4″ = 1′ scale is industry standard for floor plans (one-quarter inch on the drawing represents one foot in reality). For larger commercial spaces, consider 1/8″ = 1′ if the full plan won’t fit on standard sheets. Set your layer structure before drawing: create separate layers for walls, doors, windows, fixtures, furniture, dimensions, and notes. This organization prevents accidental changes and makes printing or sharing files with contractors straightforward. Enable the architectural unit format in the Drawing Units dialog so measurements display as feet and inches (e.g., 12′-6″) rather than decimals. Snap and Grid settings should be set to a reasonable increment, typically 1/8 inch or 1/4 inch on the screen, to help alignment without forcing every line to snap. These foundational steps take 10 minutes but save hours of cleanup later.
Essential Tools and Features for Interior Layouts
For interior design, focus on a core set of AutoCAD tools. LINE and POLYLINE create wall outlines: RECTANGLE quickly blocks out rooms. CIRCLE and ARC define curved elements. OFFSET duplicates wall thickness parallel to existing lines, critical for converting single-line walls into double lines representing actual 6-inch stud framing or 4-inch masonry. TRIM and EXTEND clean up intersections at doors and corners. BLOCK and INSERT are essential for reusable elements: create furniture symbols (sofa, desk, dining table) at actual size in separate drawings, then insert them into your floor plan at the correct scale. A well-stocked block library saves time and ensures consistency. HATCH can fill areas with patterns to indicate flooring type, representing tile, hardwood, or carpet in plan view. DIMENSION tools (LINEAR, ALIGNED, and RADIUS) annotate critical distances so contractors and clients understand the layout without guessing. The PROPERTIES panel lets you confirm that lines, blocks, and annotations are on the correct layers. Don’t rely on color for documentation, use layers and line weights instead, because some clients print in black and white.
Creating Accurate Floor Plans and Dimensions
An accurate floor plan begins with verified measurements. Before drawing anything in AutoCAD, confirm dimensions on-site: width and length of each room, ceiling height, location of windows and doors, and position of fixed elements like HVAC ducts, plumbing stacks, and electrical panels. Photograph existing conditions and take notes on structural walls versus non-load-bearing partitions. Once measurements are confirmed, begin drafting walls as single lines centered on the wall thickness, this prevents double-counting depth. Use OFFSET to create the finished wall appearance: for example, offset a centerline by 2.75 inches (half the 6-inch nominal stud dimension) on each side to show the actual wall footprint. Place doors and windows at their exact positions, representing swing direction with arcs. Most interior designers use a standard door symbol: 3′-0″ x 6′-8″ x 1-3/8″ solid core or 1-3/4″ is typical for residential interiors. Windows are drawn as pairs of parallel lines showing frame depth. Once the architectural shell is drawn, add dimensions. Place horizontal dimensions along the top and bottom of the plan, and vertical dimensions to the left and right. Dimensions should start from a common reference point, usually a corner, to minimize compounding measurement errors if contractors scale the drawing. Include ceiling height callouts in rooms where it differs from standard 8′-0″. Label room names, square footage, and finish materials on the plan. Use MTEXT (multiline text) for notes and keep font size consistent, typically 1/8 inch at print scale, which reads clearly without clutter. A well-dimensioned plan prevents the phrase “I didn’t know it was going to be that narrow” from a contractor or client.
Designing Furniture Placement and Space Planning
Furniture placement transforms a blank floor plan into a functional space plan, and AutoCAD’s scale-accuracy ensures that your sofa will actually fit. Create furniture blocks at full size: a standard sofa is approximately 84″ long x 38″ deep (7′ x 3′ 2″), a 36″ round dining table for four, 18″ x 24″ nightstands. These blocks should be drawn in a separate file at 1:1 scale (actual dimensions) so they can be inserted into floor plans and automatically scaled to match your drawing. When placing furniture, confirm clearance requirements: traffic paths through a room need at least 36 inches: walking routes to doors should be 30-36 inches wide. In kitchens, allow 42-48 inches between opposite counters or appliances for two people to work safely. In living rooms, seating arrangements typically sit 8-10 feet apart for comfortable conversation. Insert furniture blocks and use MOVE, ROTATE, and ARRAY commands to test multiple layouts. The visual feedback, seeing a furniture arrangement at true scale, often reveals problems that sketches miss: a hallway that’s too narrow for a dresser, or a dining table that blocks the kitchen door. Arrange furniture to create zones (sleeping area, work area, entertaining space) while maintaining sight lines and natural traffic flow. Use a different layer for furniture so it can be hidden or printed separately. Color-code layers (walls in blue, furniture in red, dimensions in black) for on-screen clarity, but remember that printed output should be readable in black and white.
Best Practices for Client Presentations and Revisions
Presenting an AutoCAD floor plan to a client requires more than opening the DWG file on your laptop. Export the plan as a high-resolution PDF, set the resolution to at least 300 DPI and include a scale bar so clients can verify dimensions if they print the document. Add a title block with project name, date, and your name, along with a north arrow and sheet number if the project has multiple sheets. Present the plan on a printed sheet or on-screen at actual scale (or consistent scale) to prevent the client from misinterpreting sizes. Walk the client through the plan using a laser pointer or on-screen markup, explaining the reasoning behind furniture placement and traffic flow. Encourage questions and note any requested changes directly on a printed copy or in markup annotations. When revisions come in, use AutoCAD’s PROPERTIES panel to confirm you’re editing the correct elements. Update dimensions immediately after moving walls or furniture: many revision delays stem from forgotten dimension updates. Use UNDO to step back if a change goes wrong, or maintain a backup copy of the original plan before major revisions. If a client requests multiple layouts (two dining options, for example), save each as a separate layout within the same file or as separately named files, never overwrite the approved version. After final approval, freeze or lock the base architectural layers to prevent accidental edits. Export final plans for contractor use in a standard format: DWG for AutoCAD recipients, PDF for others. Include a note on the title block stating that the plan is for interior design purposes and that any structural or code-related changes require a licensed architect or engineer’s review.
Conclusion
AutoCAD remains the professional standard for interior design because it delivers precision, control, and credibility that clients and contractors respect. Mastering the software, setting up templates, organizing layers, and dimensioning accurately, transforms a tool into a competitive advantage. Designers who invest time in learning AutoCAD’s strengths and workflows deliver better projects, fewer revision surprises, and clearer communication across the design and construction process. Whether you’re new to AutoCAD or refining your workflow, these fundamentals will improve your output and client confidence.